Sommario
Entering/Editing Map
The interface for entering and editing a map are identical.
To add a new map click on New Map on the navigation menu.
The interface (Fig. 1) is presented as a list of fields text where the red color highlights the obligation.
The interface (Fig. 1) is presented as a list of fields text where the red color highlights the obligation.

Fig. 1: Example of card related to add map.
The most important parameters in the main tab of the card insertion/modification are the following:
- Group: name or ID of the map
- Width/Height: it allows you to pecify the map size in pixels
- Map Type: it allows you to choose the map type for displaying it (Hybrid, Normal, Land, Satellite)
- Latitude/Longitude: it allows you to specify the coordinates of initialization (Fig. 2). By specifying these data, the map will be centered on the coordinates. This field does not generate a geolocation (an icon for instance). If you want to place an icon of geolocation you will need to create a new point and attach it to the map.
- Detail's level: you can choose the zoom level that will be applied initially to the map.
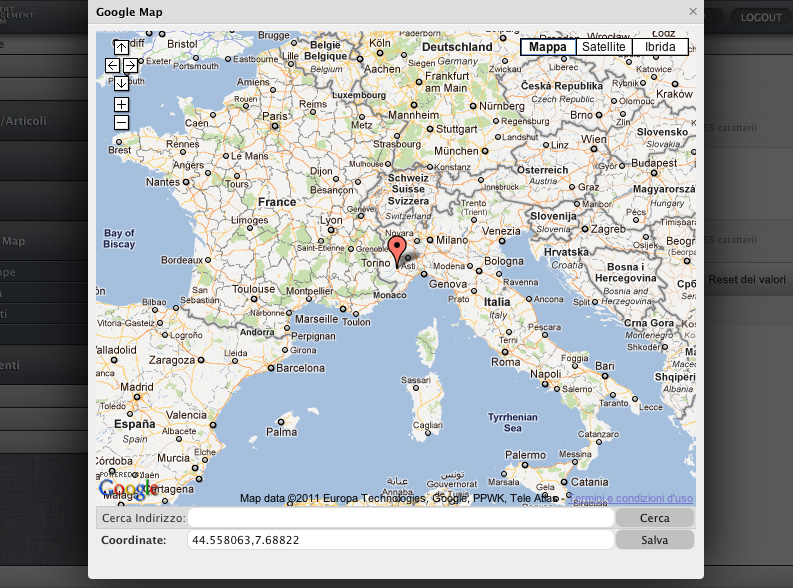
Fig. 2: Clicking on the lens placed at the side of the latitude/longitude field, it will open a pop-up for the selection of geolocation.
The pop-up in Fig 2 allows you to select a point on the map. Clicking on the map with your mouse you will set a new point and in the coordinates field will be saved the last clicked point. If you want you can also search through the address search field (it is recommended to enter the full address, including zip and Country). Once you find the desired point, simply click Save for retrieving the coordinates in the field below.